
THE CAPSULE HANDBOOK
Make a memory.
Give it a future.
How to create a time capsule, step by step. Follow the editor, add the moments that matter, and give someone a day worth opening.

Before the editor
Choose a Time Capsule
Open Create and choose Time Capsule for a future reveal. Choose QR Keepsake if the gift should open immediately. A template can give you a starting message and look.
- Decide who you are making it for and what moment it should open on.
- Gather your letter and any photos, voice notes, or videos you want to include.
- You can draft before signing in. You will need an account to save and launch.
Editor · Your Story
Give it a name and a story
In Your Story, fill in the capsule name, choose a category, pick a theme, and write your message. Category suggestions are a starting point: replace them with your own words.
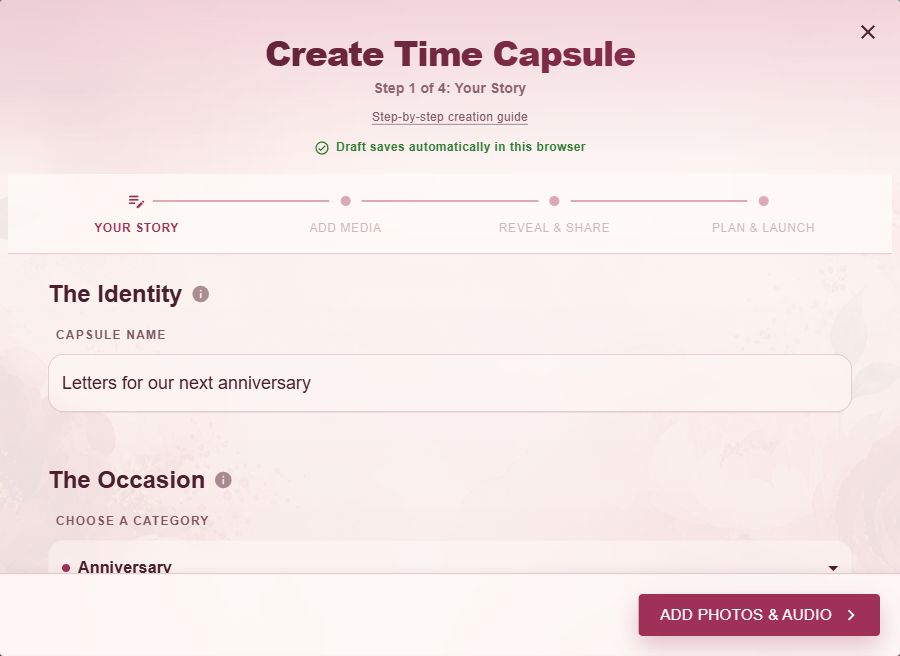
- Use a name you will recognize later, such as “Letters for our next anniversary.”
- Choose an occasion or category, then keep the suggested theme or select another look.
- Write who the message is for, what life feels like today, and what you hope they remember.
- Select “Add Photos & Audio” to continue.
Editor · Add Media
Bring the memory to life
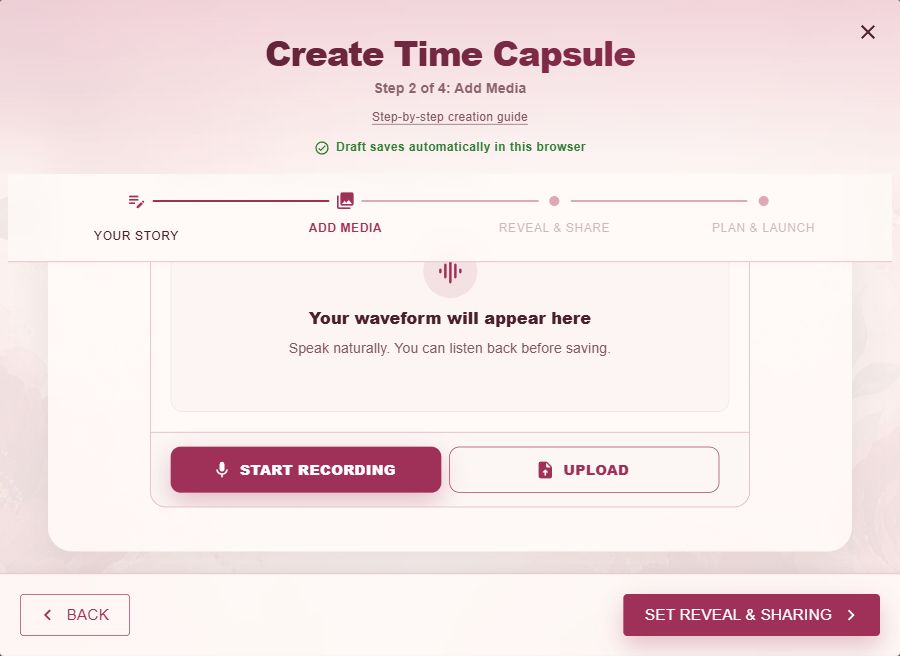
In Add Media, add photos, record or upload a voice message, and add video. Media is optional: a written letter can be a complete capsule.
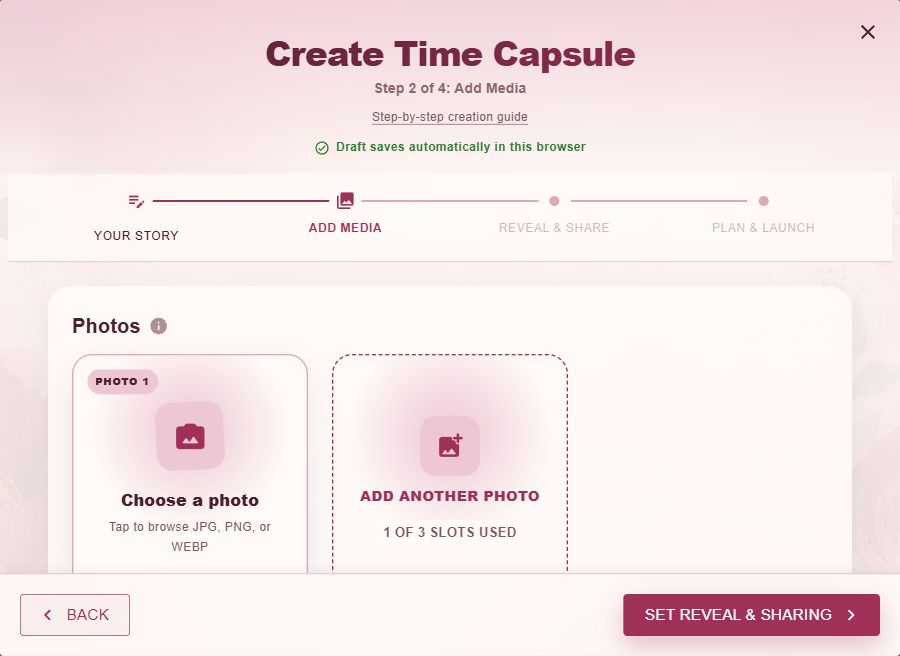
- Select photos and check each preview. Add context wherever the editor offers a caption or note.
- Record or upload a voice message. Listen back to check the sound and the whole message.
- Add a video, then check that it plays correctly.
- Follow the file size limits shown beside the upload controls. Continue with “Set Reveal & Sharing.”
Editor · Reveal & Share
Set the date, privacy, and people
In Reveal & Share, select the unlock date, check visibility, and add contributor names and email addresses if others should help make it.
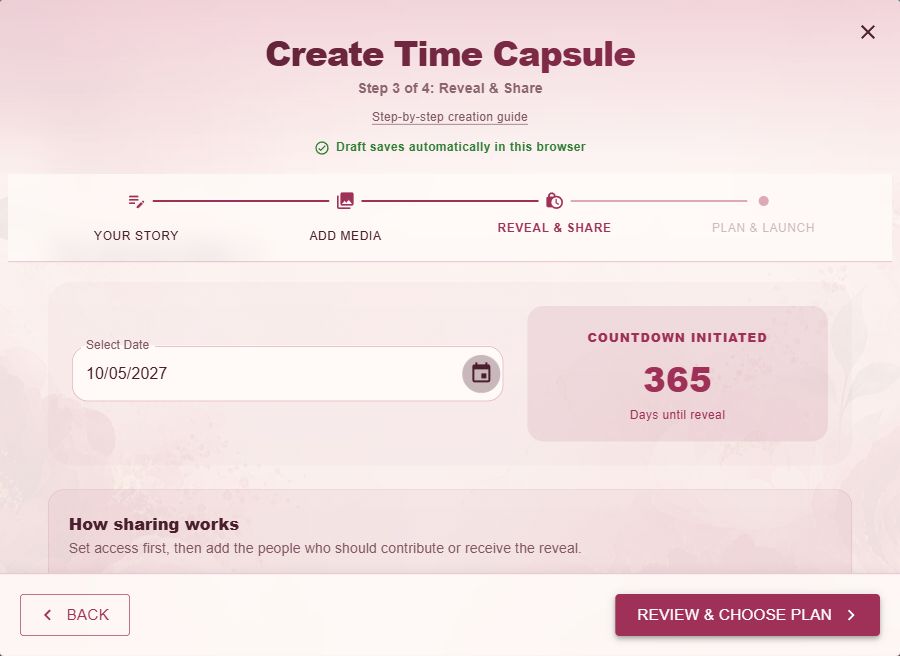
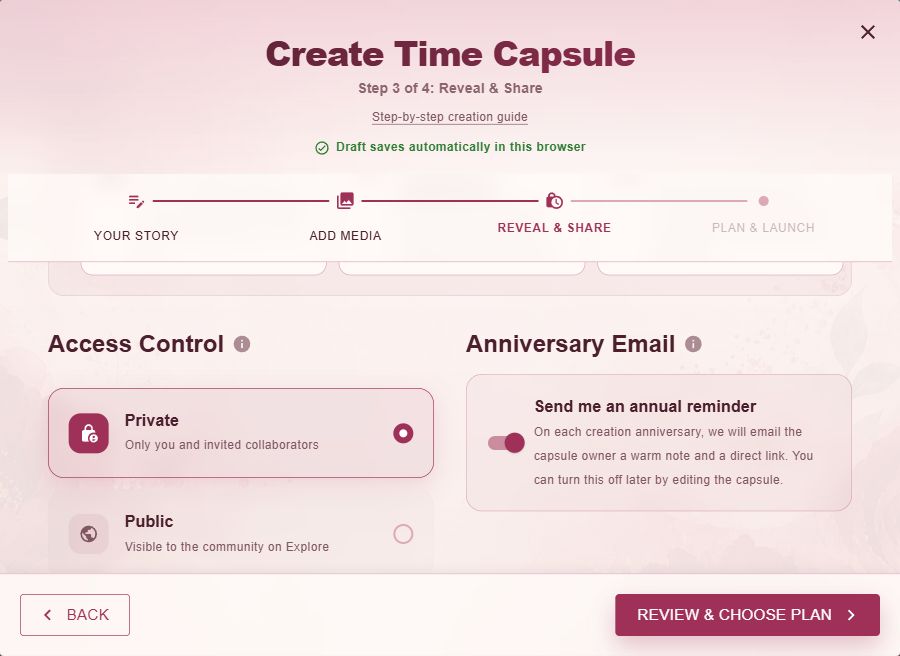
- Choose a reveal date in the future. Free capsules need a near-term date within their 14-day hosting period; a later date requires a paid plan.
- Keep “Private” selected for a personal keepsake. Choose “Public” only if you want it to appear in Explore.
- Add collaborators using the email addresses they will sign in with. Free and Premium include two; adding a third reserves the Collaborative plan.
- Review the date and email addresses, then select “Review & Choose Plan.”
Editor · Plan & Launch
Preview, choose a plan, and save
Use Preview to read the message and check your media and theme before saving. Then choose the hosting plan that fits the reveal and the number of contributors.
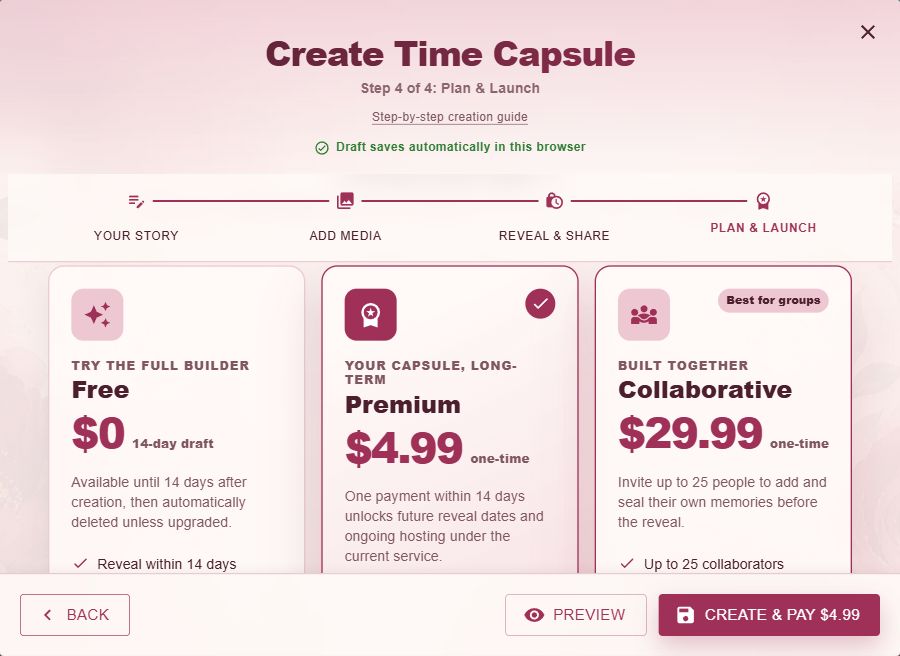
- Go Back if the preview needs changes. Check names, spelling, media playback, and the reveal date.
- Free is for a short-term capsule. Premium supports ongoing hosting and two invited contributors; Collaborative supports up to 25.
- Use the create or payment button shown for your plan. If prompted, sign in with Google or a one-time email code and complete the account steps.
- For a paid capsule, complete checkout. Wait for the saved capsule confirmation before sharing.
MATCH THE PLAN TO THE MOMENT
A quick hosting check.
| Plan | Price | Hosting | Invited contributors |
|---|---|---|---|
| Free | $0 | 14 days | Up to 2 |
| Premium | $4.99one time | Ongoing under the current service | Up to 2 |
| Collaborative | $29.99one time | Ongoing under the current service | Up to 25 |
For a distant birthday or anniversary, choose paid hosting. See full plan details.
ONE LAST LOOK
Ready for the reveal?
- The message says what you want it to say.
- Every photo, recording, and video opens or plays.
- The date, privacy, and invited email addresses are correct.
- The hosting plan covers the time until your reveal.
- The saved link and final printed QR work.
- Your important files have a separate backup.
WHEN YOU NEED A HAND
Common questions
Do I have to create an account first?
You can write a draft before signing in. Saving, launching, and managing a capsule use your account. The local draft belongs to this browser; keep separate copies of your text and media.
Can I schedule a capsule for years from now?
Yes, choose a paid hosting plan for a reveal beyond the free 14-day period. Paid hosting is provided under the current service. Keep independent backups of important photos, videos, and recordings.
Can I edit a capsule after saving it?
The owner can manage the capsule and change its unlock date. Some content fields can be locked for editing, so check the saved capsule’s controls before relying on a later change. Preview your message and media before launching.
Why can’t a contributor add a memory?
Check that the contributor is invited, signs in with the exact invited email address, and is within the contribution window. Check the capsule’s contribution deadline and plan limits. A distant reveal date does not keep contributions open for years.
What if my media won’t upload?
Check the file size and type against the limits shown in the editor. Retry on a stable connection and check playback before saving. If returning to a draft, select the original files again when needed.
Can someone open a private capsule without an app?
Recipients use a browser to open its access link or QR. Before reveal, ordinary visitors see a locked state. After reveal, anyone holding that link can view the content; private visibility prevents public discovery, and links can be forwarded.
A SMALL START. A MEANINGFUL REVEAL.
Your future memory starts here.
Choose a moment. Write the first line. Add the voices they will want to hear again.
Create my time capsule